AirPlay Receiver in macOS Monterey prevents aspnet core apps from launching in vscode

Monterey uses TCP:5000 by default for a system process which stops aspnet core apps from starting properly as configured in launch.json in all of our aspnet core projects in vscode because that is the default template.

"env": { "ASPNETCORE_ENVIRONMENT": "Development", "ASPNETCORE_URLS": "https://*:5001;http://*:5000" }

[master] $ ASPNETCORE_URLS="https://*:5001;http://*:5000" dotnet bin/Debug/netcoreapp3.1/WebApp-OpenIDConnect-Group-Role-Transform.dll
crit: Microsoft.AspNetCore.Server.Kestrel[0]
      Unable to start Kestrel.
System.IO.IOException: Failed to bind to address http://[::]:5000: address already in use.
 ---> Microsoft.AspNetCore.Connections.AddressInUseException: Address already in use
 ---> System.Net.Sockets.SocketException (48): Address already in use
   at System.Net.Sockets.Socket.UpdateStatusAfterSocketErrorAndThrowException(SocketError error, String callerName)
   at System.Net.Sockets.Socket.DoBind(EndPoint endPointSnapshot, SocketAddress socketAddress)
   at System.Net.Sockets.Socket.Bind(EndPoint localEP)
   at Microsoft.AspNetCore.Server.Kestrel.Transport.Sockets.SocketConnectionListener.Bind()
   --- End of inner exception stack trace ---
   at Microsoft.AspNetCore.Server.Kestrel.Transport.Sockets.SocketConnectionListener.Bind()
   at Microsoft.AspNetCore.Server.Kestrel.Transport.Sockets.SocketTransportFactory.BindAsync(EndPoint endpoint, CancellationToken cancellationToken)
   at Microsoft.AspNetCore.Server.Kestrel.Core.KestrelServer.<>c__DisplayClass21_0`1.<<StartAsync>g__OnBind|0>d.MoveNext()
--- End of stack trace from previous location where exception was thrown ---
   at Microsoft.AspNetCore.Server.Kestrel.Core.Internal.AddressBinder.BindEndpointAsync(ListenOptions endpoint, AddressBindContext context)
   --- End of inner exception stack trace ---
   at Microsoft.AspNetCore.Server.Kestrel.Core.Internal.AddressBinder.BindEndpointAsync(ListenOptions endpoint, AddressBindContext context)
   at Microsoft.AspNetCore.Server.Kestrel.Core.ListenOptions.BindAsync(AddressBindContext context)
   at Microsoft.AspNetCore.Server.Kestrel.Core.AnyIPListenOptions.BindAsync(AddressBindContext context)
   at Microsoft.AspNetCore.Server.Kestrel.Core.Internal.AddressBinder.AddressesStrategy.BindAsync(AddressBindContext context)
   at Microsoft.AspNetCore.Server.Kestrel.Core.Internal.AddressBinder.BindAsync(IServerAddressesFeature addresses, KestrelServerOptions serverOptions, ILogger logger, Func`2 createBinding)
   at Microsoft.AspNetCore.Server.Kestrel.Core.KestrelServer.StartAsync[TContext](IHttpApplication`1 application, CancellationToken cancellationToken)
Unhandled exception. System.IO.IOException: Failed to bind to address http://[::]:5000: address already in use.
 ---> Microsoft.AspNetCore.Connections.AddressInUseException: Address already in use
 ---> System.Net.Sockets.SocketException (48): Address already in use
   at System.Net.Sockets.Socket.UpdateStatusAfterSocketErrorAndThrowException(SocketError error, String callerName)
   at System.Net.Sockets.Socket.DoBind(EndPoint endPointSnapshot, SocketAddress socketAddress)
   at System.Net.Sockets.Socket.Bind(EndPoint localEP)
   at Microsoft.AspNetCore.Server.Kestrel.Transport.Sockets.SocketConnectionListener.Bind()
   --- End of inner exception stack trace ---
   at Microsoft.AspNetCore.Server.Kestrel.Transport.Sockets.SocketConnectionListener.Bind()
   at Microsoft.AspNetCore.Server.Kestrel.Transport.Sockets.SocketTransportFactory.BindAsync(EndPoint endpoint, CancellationToken cancellationToken)
   at Microsoft.AspNetCore.Server.Kestrel.Core.KestrelServer.<>c__DisplayClass21_0`1.<<StartAsync>g__OnBind|0>d.MoveNext()
--- End of stack trace from previous location where exception was thrown ---
   at Microsoft.AspNetCore.Server.Kestrel.Core.Internal.AddressBinder.BindEndpointAsync(ListenOptions endpoint, AddressBindContext context)
   --- End of inner exception stack trace ---
   at Microsoft.AspNetCore.Server.Kestrel.Core.Internal.AddressBinder.BindEndpointAsync(ListenOptions endpoint, AddressBindContext context)
   at Microsoft.AspNetCore.Server.Kestrel.Core.ListenOptions.BindAsync(AddressBindContext context)
   at Microsoft.AspNetCore.Server.Kestrel.Core.AnyIPListenOptions.BindAsync(AddressBindContext context)
   at Microsoft.AspNetCore.Server.Kestrel.Core.Internal.AddressBinder.AddressesStrategy.BindAsync(AddressBindContext context)
   at Microsoft.AspNetCore.Server.Kestrel.Core.Internal.AddressBinder.BindAsync(IServerAddressesFeature addresses, KestrelServerOptions serverOptions, ILogger logger, Func`2 createBinding)
   at Microsoft.AspNetCore.Server.Kestrel.Core.KestrelServer.StartAsync[TContext](IHttpApplication`1 application, CancellationToken cancellationToken)
   at Microsoft.AspNetCore.Hosting.GenericWebHostService.StartAsync(CancellationToken cancellationToken)
   at Microsoft.Extensions.Hosting.Internal.Host.StartAsync(CancellationToken cancellationToken)
   at Microsoft.Extensions.Hosting.HostingAbstractionsHostExtensions.RunAsync(IHost host, CancellationToken token)
   at Microsoft.Extensions.Hosting.HostingAbstractionsHostExtensions.RunAsync(IHost host, CancellationToken token)
   at Microsoft.Extensions.Hosting.HostingAbstractionsHostExtensions.Run(IHost host)
   at WebApp_OpenIDConnect_Group_Role_Transform.Program.Main(String[] args) in /Users/breiter/src/wolfereiter/wolfereiter-graph-claimstransform/demo/WebApp-OpenIDConnect-Group-Role-Transform/Program.cs:line 16
Abort trap: 6

It turns out the process listening to TCP:5000 is ControlCenter — which is the thing in the menubar for toggling settings. But it also is apparently the process that implements the new “AirPlay Receiver” feature in Monterey — which I didn’t even know existed.

$ lsof -i TCP:5000 -P +c 0
COMMAND         PID    USER   FD   TYPE             DEVICE SIZE/OFF NODE NAME
ControlCenter 33966 breiter   35u  IPv4 0x67ea478e699d1bad      0t0  TCP *:5000 (LISTEN)
ControlCenter 33966 breiter   36u  IPv6 0x67ea478e6a6607f5      0t0  TCP *:5000 (LISTEN)

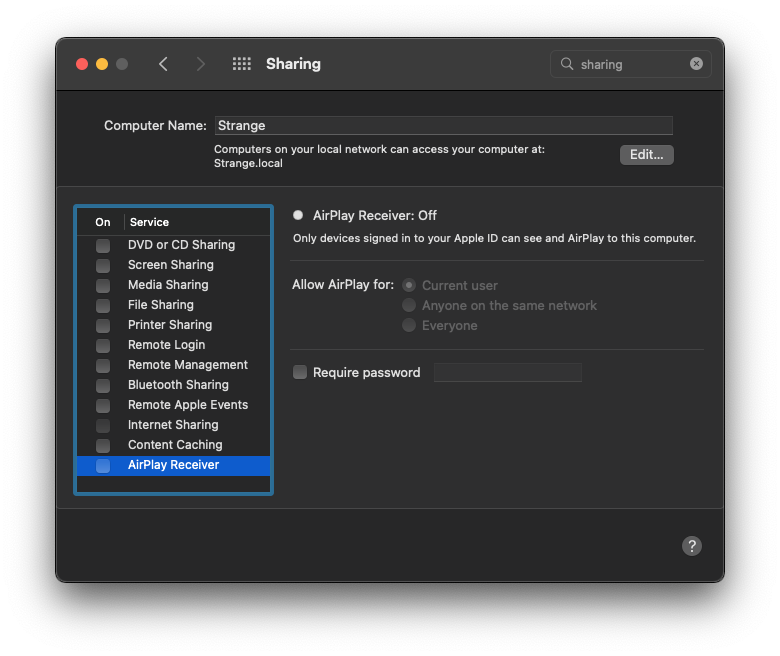
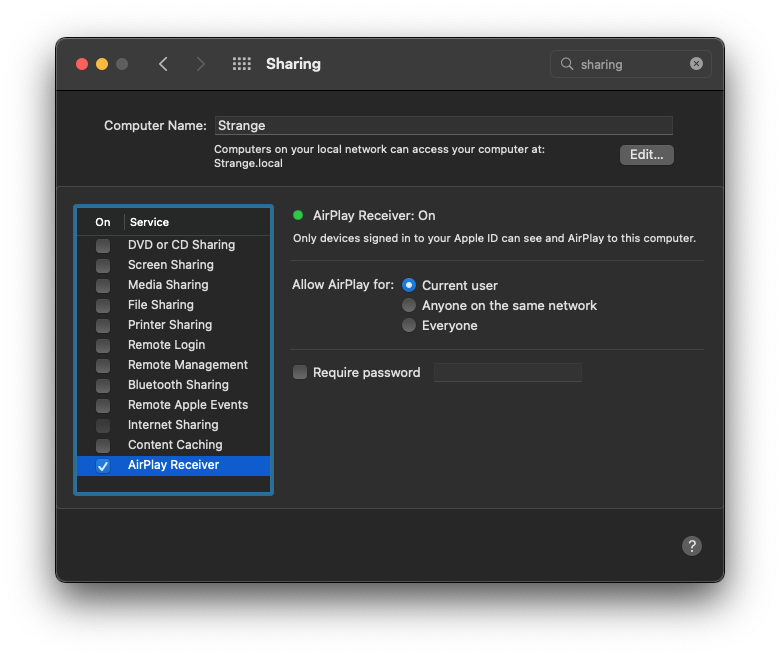
The idea is that you can AirPlay music from your iphone to your computer and have the audio come out of the speakers that are connected to the computer. I don’t have any use for this feature. The quick fix is to go into System Preferences > Sharing and disable “AirPlay Receiver”. Long term, it’s probably simplest to migrate away from TCP:5000 as the default for HTTP .vscode/launch.json for aspnet core projects.

[master] $ ASPNETCORE_URLS="https://*:5001;http://*:5000" dotnet bin/Debug/netcoreapp3.1/WebApp-OpenIDConnect-Group-Role-Transform.dll
info: Microsoft.Hosting.Lifetime[0]
      Now listening on: https://[::]:5001
info: Microsoft.Hosting.Lifetime[0]
      Now listening on: http://[::]:5000
info: Microsoft.Hosting.Lifetime[0]
      Application started. Press Ctrl+C to shut down.
info: Microsoft.Hosting.Lifetime[0]
      Hosting environment: Production
info: Microsoft.Hosting.Lifetime[0]
      Content root path: /Users/breiter/src/wolfereiter/wolfereiter-graph-claimstransform/demo/WebApp-OpenIDConnect-Group-Role-Transform

Set up a dotnet core development environment with VS Code, MacPorts, and Docker

Install and configure MacPorts

While a package manager is not strictly necessary to get a dotnet core development environment up and running, it is extremely useful to have a single tool to update utilities rather than manually discovering the need to update and manually downloading them. It’s also useful to set up a consistent command line environment with Linux. You can use my step-by-step guide to set up MacPorts.

To sum up:

  • Install MacPorts
  • Set up paths in /etc/paths and /etc/manpaths
  • Set up /etc/shells
  • Install Linux-flavor core tools sudo port install bash bash-completion coreutils findutils grep gnutar gawk wget
  • Set up ~/.bash_profile and ~/.bashrc

Install mono and mssql-tools

The intellisense engine for C# dotnet core projects in VSCode on Mac and Linux doesn’t use the dotnet core compilers, it uses mono. Microsoft has also provided ports of the SQL Server tools, sqlcmd and bcp

Visual Studio for Mac also depends on mono. If you have and use Visual Studio for Mac, you don’t need to install mono here. On the other hand, if you have an abandoned installation of Visual Studio for Mac you may want to remove it and start over. I have instructions for uninstalling Visual Studio for Mac at the end of this document.

sudo port install mono mssql-tools

Install dotnet core SDK

MacPorts does not manage installs of the dotnet core SDKs, but Microsoft does offer scripts to install and uninstall. I created a simple shell script to combine these together to maintain the 2.1 and 3.1 LTS SDKs.

To sum up, install two scripts from Microsoft and one from me into /usr/local/bin:

curl -sSL https://raw.githubusercontent.com/dotnet/cli/master/scripts/obtain/uninstall/dotnet-uninstall-pkgs.sh \
    | sudo tee /usr/local/bin/dotnet-uninstall-pkgs > /dev/null
sudo chmod +x /usr/local/bin/dotnet-uninstall-pkgs
curl -sSL https://dot.net/v1/dotnet-install.sh \
    | sudo tee /usr/local/bin/dotnet-install > /dev/null
chmod +x /usr/local/bin/dotnet-install
curl -sSL https://gist.github.com/breiter/aef0c0acbeb24cabe0fa16c7ecfdb88c/raw/b4e9de4b20141b0a05aadd03d5842752104b1475/dotnet-upgrade-sdks.sh  \
    | sudo tee /usr/local/bin/dotnet-upgrade-sdks > /dev/null
chmod +x  /usr/local/bin/dotnet-upgrade-sdks

Once those three scripts are in place, you can install or upgrade the dotnet 2.1 LTS and dotnet 3.1 LTS SDKs to the latest versions. If you have previous versions of the dotnet SDKs installed, the script will remove them cleanly.

sudo dotnet-upgrade-sdks

After the script completes, you should have two dotnet core SDKs.

$ dotnet --list-sdks
2.1.804 [/usr/local/share/dotnet/sdk]
3.1.301 [/usr/local/share/dotnet/sdk]

Install dotnet global tools

The dotnet command is extensible. Commands added to dotnet are called “tools” which can be installed in a project or globally for your account. There are a large number of tools available, but two key ones are the dotnet-ef and libman tools.

The dotnet-ef tool is the Entity Framework core tool for generating and managing migrations. The libman tool is for managing javascript library packages in an aspnet core project as a replacement for bower which is becoming unmaintained and isn’t tied up with nodejs.

dotnet tool install --global dotnet-ef
dotnet tool install --global libman

Unfortunately dotnet tool doesn’t have any command for update-all, but it is straightforward to pipe output the list command to the update command.

#!/bin/sh
# list global tools installed
# select tool <PACKAGE_ID>
# execute `dotnet tool update --global <PACKAGE_ID>`
dotnet tool list --global | awk 'NR > 2 {print $1}' | xargs -L1 dotnet tool update --global

curl -sSL https://gist.githubusercontent.com/breiter/ffef5d134e87667bd8bdd5c561b9641e/raw/f83700ed67de6765223376d17c9823f23d1ce502/dotnet-tool-update-all.sh \
    | sudo tee /usr/local/bin/dotnet-tool-update-all > /dev/null

You can now ensure your global tools are current:

dotnet-tool-update-all

bash-completion for dotnet

You can set up tab completions for dotnet

In order for this to work you have to have installed bash-completion, which should have been part of your MacPorts setup.

sudo port install bash bash-completion

code ~/.bashrc

if [ -f /opt/local/etc/profile.d/bash_completion.sh ]; then
  . /opt/local/etc/profile.d/bash_completion.sh
fi

_dotnet_bash_complete() {
  local word=${COMP_WORDS[COMP_CWORD]}

  local completions
  completions="$(dotnet complete --position "${COMP_POINT}" "${COMP_LINE}" 2>/dev/null)"
  if [ $? -ne 0 ]; then
    completions=""
  fi

  COMPREPLY=( $(compgen -W "$completions" -- "$word") )
}

#enable command-line completiong for dotnet
complete -f -F _dotnet_bash_complete dotnet

Install VSCode

Download and install VSCode from code.visualstudio.com. Once you install it, VSCode is self-updating.

The first time you launch VSCode, you need to manually install the code command.

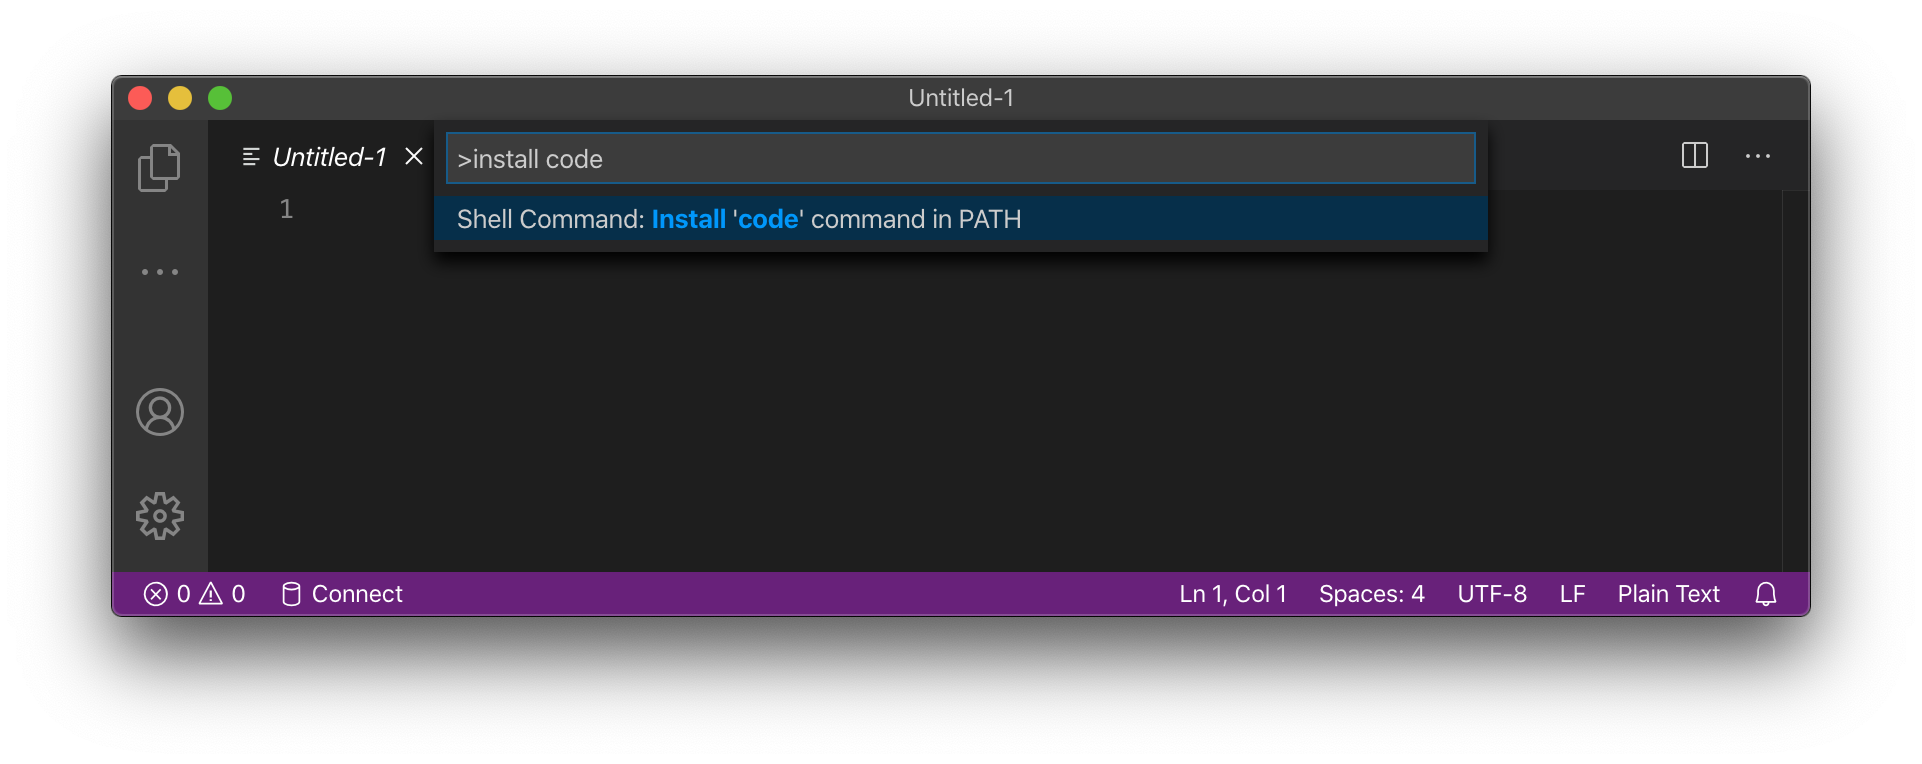
cmd + shift + p type “install code” and select the “Install ‘code’ command in PATH” option.

What this does is create a symbolic link to the code command inside the app bundle for VSCode to /usr/local/bin/code.

$ ls -l `which code`
lrwxr-xr-x 1 breiter wheel 68 Jun 27  2017 /usr/local/bin/code -> '/Applications/Visual Studio Code.app/Contents/Resources/app/bin/code'

Or alternatively, you could do this old-school by hand:

ln -s /usr/local/bin/code '/Applications/Visual Studio Code.app/Contents/Resources/app/bin/code'

At this point, I would recommend that you install a handful of extensions to make C# and aspnet core intellisense and debugging work.

VSCode extensions you really need

# C# XML comments
code --install-extension k--kato.docomment
# CSS support in HTML (and Razor) documents
code --install-extension ecmel.vscode-html-css
# C# language and debugging support (from Microsoft)
code --install-extension ms-dotnettools.csharp

Some additional nice VSCode extensions

# bookmarks
code --install-extension alefragnani.Bookmarks
# aligment
code --install-extension annsk.alignment
# gitlens
code --install-extension eamodio.gitlens
# Docker
code --install-extension ms-azuretools.vscode-docker
# SQL Tools (nice client for various DB engines)
code --install-extension mtxr.sqltools
# Spell check in code
code --install-extension streetsidesoftware.code-spell-checker
# syntax and intellisense for .csproj files
code --install-extension tintoy.msbuild-project-tools

Install Azure Data Studio

Azure Data Studio is the open source, cross-platform, spiritual successor to Query Analyzer. It’s a dedicated SQL Server (and PostgreSQL) client based on a fork of VSCode that is much more lightweight than SQL Server Enterprise Studio. Download Azure Data Studio from GitHub

Recommended extensions:

  • Admin Pack for SQL Server
  • PostgreSQL

Install Docker for Mac

In order to run SQL Server on Mac, you need Docker for Mac. I also find it more convenient to run PostgreSQL in Docker than on the base OS. In addition, you need Docker to build and run Docker images and push them to a repository. VMWare Fusion 11.5.5 has implemented a dockerd runtime and there are other virtualization methods to get Docker running on Mac but by far the most straightforward is Docker Desktop for Mac.

Docker Desktop for Mac integrates with the macOS Hypervisor.framework using an enhanced fork of the bhyve hypervisor from FreeBSD called (HyperKit)[https://github.com/moby/hyperkit] that maintained by Docker as part of the Moby project. It works very well.

Download and install the “stable” version from docker.com.

Install an HTTP protocol debugger

  • Charles proxy is a cross-platform HTTP protocol debugger built on Java that works on Windows, macOS, and Linux.
  • Proxyman is a new macOS native HTTP protocol debugger.
  • Fiddler is the de facto standard free HTTP protocol debugger on Windows built on .NET Windows Forms. Telerik has a rebuilt “Fiddler Everywhere” that is rebuilt to be cross-platform in beta.
  • mitmproxy is a command-line, open source HTTP debugger built on python. It works but is more difficult to use than the commercial ones above. sudo port install py-mitmproxy
  • Wireshark is the de facto standard TCP/IP protocol analyzer. sudo port install wireshark3 +qt

I haven’t tried Proxyman or Fiddler Everywhere. I have used mitmproxy and I would recommend paying for one of the GUI options. I use Charles and Wireshark regularly.

Visual Diff/Merge

I confess that I have a bit of a collection of these tools going. My general purpose favorite is Beyond Compare from Scooter Software. I also have Kaleidoscope and Sublime Merge.

I use smerge to browse git repos and to resolve merge conflicts in git. Sublime Merge is wicked fast, if somewhat inscrutable.

I use Kaleidoscope primarily for the git difftool command because it loads a multi-file diff into a set of tabs rather whereas Beyond Compare will load each file in a window sequentially, popping a new code diff window after you close the previous one.

diff and merge settings from my global ~/.gitconfig

[diff]
    tool = Kaleidoscope
[difftool]
    prompt=false
[merge]
    tool = smerge
[mergetool]
    prompt=false
    keepBackup = false
[diff "tool.bc3"]
    trustExitCode = true
[merge "tool.bc3"]
    trustExitCode = true
[difftool "smerge"]
    cmd = smerge mergetool --no-wait \"$LOCAL\" \"$REMOTE\" -o \"$MERGED\"
    trustExitCode = true
[mergetool "smerge"]
    cmd = smerge mergetool \"$BASE\" \"$LOCAL\" \"$REMOTE\" -o \"$MERGED\"
    trustExitCode = true
[difftool "Kaleidoscope"]
  cmd = ksdiff --partial-changeset --relative-path \"$MERGED\" -- \"$LOCAL\" \"$REMOTE\"
[mergetool "Kaleidoscope"]
  cmd = ksdiff --merge --output \"$MERGED\" --base \"$BASE\" -- \"$LOCAL\" --snapshot \"$REMOTE\" --snapshot
  trustExitCode = true

BONUS: Cloud service clients

AWS and Azure have CLI interfaces to automate actions respectively: aws and az. Both are based on python3.

Install AWS command-line client

sudo port install py-awscli

Edit ~/.bashrc and add aws cli completions after initializing bash completion.

#enable command-line completion for aws
complete -C aws_completer aws

Install Azure command-line client

For some reason, the Azure team is all in on Homebrew for macOS they are sitting on an open community request for a .pkg package and have closed a request to add MacPorts package.

The only viable option outside of Homebrew is to use a Docker container or their shell script installer for Linux.

The CLI requires the following software:
– Python 3.6.x, 3.7.x or 3.8.x.
– libffi
– OpenSSL 1.0.2

Make sure you have the pre-requisites.

$ port installed|egrep '^\s+(libffi|python3|openssl)'
  libffi @3.2.1_0 (active)
  openssl @1.1.1g_0 (active)
  python3_select @0.0_1 (active)
  python38 @3.8.3_0 (active)

Also, I’ve looked at the script and it assumes that GNU coreutils are in the path. You need to have set up a Linux-style environment with MacPorts with coreutils in path replacing the BSD versions shipped from Apple for this to work. It might work if you ust have the md5sha1sum package installed instead, but keep in mind this script was designed for Linux + GNU environment.

curl -L https://aka.ms/InstallAzureCli | bash

Follow the prompts. It should all work. The script from Microsoft will install or update az.

I saved this as /usr/local/bin/install-azure-cli.

curl -sSL https://gist.github.com/breiter/e436c0604b58a1f38be2329209405571/raw/d693886818d11bb1cade02637ababc1849925c6e/install-azure-cli.sh \ 
  | sudo tee /usr/local/bin/install-azure-cli > /dev/null
sudo chmod +x /usr/local/bin/install-azure-cli

BONUS: Configure postifx smtp relay

It should not strictly necessary, but I often find that it useful to have a local MTA that works. Follow my guide to set up postfix in macOS to accept mail on your local machine port 25 and relay it through a smart host such as SES, GMail, or Outlook.com.

BONUS: Clean uninstall of Visual Studio for Mac and Mono.framework

uninstall-vsmac script

Uninstall Visual Studio for Mac.

#!/bin/sh
# Uninstall Visual Studio for Mac
echo "Uninstalling Visual Studio for Mac..."
sudo rm -rf "/Applications/Visual Studio.app"
rm -rf ~/Library/Caches/VisualStudio
rm -rf ~/Library/Preferences/VisualStudio
rm -rf ~/Library/Preferences/Visual\ Studio
rm -rf ~/Library/Logs/VisualStudio
rm -rf ~/Library/VisualStudio
rm -rf ~/Library/Preferences/Xamarin/
rm -rf ~/Library/Application\ Support/VisualStudio
rm -rf ~/Library/Application\ Support/VisualStudio/7.0/LocalInstall/Addins/
# Uninstall Xamarin.Android
echo "Uninstalling Xamarin.Android..."
sudo rm -rf /Developer/MonoDroid
rm -rf ~/Library/MonoAndroid
sudo pkgutil --forget com.xamarin.android.pkg
sudo rm -rf /Library/Frameworks/Xamarin.Android.framework
# Uninstall Xamarin.iOS
echo "Uninstalling Xamarin.iOS..."
rm -rf ~/Library/MonoTouch
sudo rm -rf /Library/Frameworks/Xamarin.iOS.framework
sudo rm -rf /Developer/MonoTouch
sudo pkgutil --forget com.xamarin.monotouch.pkg
sudo pkgutil --forget com.xamarin.xamarin-ios-build-host.pkg
# Uninstall Xamarin.Mac
echo "Uninstalling Xamarin.Mac..."
sudo rm -rf /Library/Frameworks/Xamarin.Mac.framework
rm -rf ~/Library/Xamarin.Mac
# Uninstall Workbooks and Inspector
echo "Uninstalling Workbooks and Inspector..."
sudo /Library/Frameworks/Xamarin.Interactive.framework/Versions/Current/uninstall
# Uninstall the Visual Studio for Mac Installer
echo "Uninstalling the Visual Studio for Mac Installer..."
rm -rf ~/Library/Caches/XamarinInstaller/
rm -rf ~/Library/Caches/VisualStudioInstaller/
rm -rf ~/Library/Logs/XamarinInstaller/
rm -rf ~/Library/Logs/VisualStudioInstaller/
# Uninstall the Xamarin Profiler
echo "Uninstalling the Xamarin Profiler..."
sudo rm -rf "/Applications/Xamarin Profiler.app"
echo "Finished Uninstallation process."

uninstall-mono script

Uninstall mono installed by the .pkg Mono installer.

#!/bin/sh
sudo rm -rf /Library/Frameworks/Mono.framework
sudo pkgutil --forget com.xamarin.mono-MDK.pkg
sudo rm -rf /etc/paths.d/mono-commands

Why and how to set up MacPorts package manager for macOS

Package managers for macOS

Do I need a package manager? If you never open Terminal.app the answer is definitely, no. macOS is fully functional out of the box with the software shipped by Apple. The base system of command line applications available in a default install are also good enough for poking around and getting started with learning the UNIX system. You need a package manager when you want to install UNIX tools that Apple doesn’t bundle or newer or different versions of tools that they do.

A package manager helps you to download, possibly compile, install, and update tools in the UNIX environment in macOS. Alternatively you can download and install things by hand, possibly configuring and compiling them by hand.

There are three main package managers for macOS:

Homebrew

Homebrew is currently the most popular of these, but it is “too clever by half”. My issue is primarily that it works by taking over /usr/local/bin and changing the permission on that directory. This is a security problem but also it is in conflict with the conceptual purpose of /usr/local/bin being the directory where I install programs myself. If Homebrew messes up or gets broken then it can be a big mess to clean it up without breaking anything that doesn’t belong to Homebrew.

Homebrew will also help you to install things that it doesn’t control and cannot update — which I don’t think it should do. I also find it’s beer metaphors of casks and cellars overly cute.

Homebrew is popular so it is probably the lowest friction option despite my criticism. You can also use it to automate installing apps from the App Store, commercial software, and UNIX utilities. This can be helpful if you set up a new Mac frequently or have a standard config to push out. I have heard that GitHub uses Homebrew for this.

pkgsrc

Pkgsrc comes from NetBSD. It is the standard package manager for NetBSD and SmartOS. Packages for Red Hat Enterprise Linux / CentOS, macOS, and SmartOS are maintained by Joyent. The packages are mostly pre-built binaries and pkgsrc is fast and works well. All of the packages are installed into /opt/pkg which means they are safely isolated from your base system. If somehow you borked up pkgsrc, just rm -fr /opt/pkg and install it again. If you want to get rid of pkgsrc, just rm -fr /opt/pkg and go on with life.

On the downside, all of the GUI packages for macOS are built for X rather than Quartz and the repository is smaller than Homebrew and MacPorts.

If you work in an environment with some combination of RHEL, SmartOS, and macOS then you should consider strongly standardizing on pkgsrc. For example on RHEL, instead of adding EPEL and IUS you can just not install anything on top of the base system with yum/dnf and only use yum/dnf for updating the base system. Then use pkgsrc to install all of the additional software. Then you can enjoy a very similar configuration and maintenance stack across your server and workstation fleet.

MacPorts

MacPorts (neé DarwinPorts) was originally created by engineers working in the Apple UNIX engineering team as part of the OpenDarwin project. It came out about around the same time as OS X 10.2 Jaguar. Darwin is the open source underpinning of macOS and consists of the xnu kernel plus the BSD subsystem. MacPorts was hosted by Apple on MacOS Forge but has subsequently moved to GitHub.

MacPorts used to be the de facto standard for installing open source packages on OS X for a long time until it was dethroned by Homebrew. At the time, MacPorts was criticized for wasting time and space by installing its own dependencies rather than linking to the ones from Apple. It also used to install everything by compiling from source and still does compile from source quite a bit, which can be slow. Like pkgsrc, MacPorts installs into its own sandbox: /opt/local where it can’t hurt anything and can be easily discarded. MacPorts has a variants system that lets you choose a lot of granular options when installing packages. For example, you can have GUI apps built against the native Quartz window manager whenever possible. It has a huge library of ports that are community maintained and reliable. There are problems occasionally, but they are sorted out quickly.

I’ve used all three of these systems, but have settled on MacPorts as my preference for a combination of practical and aesthetic reasons.

Setting up MacPorts

Prerequisites

Before installing MacPorts, you need to install Xcode from developer.apple.com or the App Store and the Xcode command line tools. Once you have installed Xcode, open Terminal.app and run this command to install the command line tools:

xcode-select --install

Installing macports from pkg or source

You can now probably head over to www.macports.org and download a .pkg installer for your version of macOS. If you are using a beta of a new release or the hot, fresh bits of a .0 release, the .pkg may not be available and you will have to build from source. Either download the tarball and unpack it or clone the git repo and checkout the current release tag.

# use actual latest tarball
curl -O https://distfiles.macports.org/MacPorts/MacPorts-2.6.2.tar.bz2
tar xf MacPorts-2.6.2.tar.bz2

OR

git clone https://github.com/macports/macports-base.git
git checkout 10.6.2 # or whatever is the highest version number without a -beta or -rc suffix

Whichever way you got the source code, enter the directory in your Terminal.app, configure, build, and install.

./configure
make
sudo make install

Now you have a /opt/local directory and a port command.

Configure options

Variants

Set default variants options. I have not used X11 on macOS in years. I like to disable X and enable Quartz by default. I also like to add bash completion scripts whenever they are available.

sudo vi /opt/local/etc/macports/variants.conf

-x11 +no_x11 +quartz +bash_completion

If you live outside of the USA, it can be a significant speedup to change to a local mirror. I am using one in South Africa.

Mirrors

In macports.conf, set the rsync_server and rsync_dir to match your alternate mirror.

sudo vi /opt/local/etc/macports/macports.conf

# The rsync server for fetching MacPorts base during selfupdate. This
# setting is NOT used when downloading the ports tree; the sources for
# the ports tree are set in sources.conf. See
# https://trac.macports.org/wiki/Mirrors#MacPortsSource for a list of
# available servers.
#rsync_server           rsync.macports.org
rsync_server            jnb.za.rsync.macports.org

# Location of MacPorts base sources on rsync_server. If this references
# a .tar file, a signed .rmd160 file must exist in the same directory
# and will be used to verify its integrity. See
# https://trac.macports.org/wiki/Mirrors#MacPortsSource to find the
# correct rsync_dir for a particular rsync_server.
#rsync_dir              release/tarballs/base.tar
rsync_dir               macports/release/tarballs/base.tar

In sources.conf change the path to your local mirror.

sudo vi /opt/local/etc/macports/sources.conf

#rsync://rsync.macports.org/release/tarballs/ports.tar [default]
rsync://jnb.za.rsync.macports.org/macports/release/tarballs/ports.tar [default]

Paths

I like to have my path searched in this order:

  1. stuff I installed manually
  2. MacPorts
  3. macOS base system

MacPorts will stick itself into your PATH in your shell profile, which is a good default to make it work, but I prefer to handle this more systematically in a central location.

Edit the system default path:

sudo vi /etc/paths

/usr/local/bin
/usr/local/sbin
/opt/local/libexec/gnubin
/opt/local/bin
/opt/local/sbin
/usr/bin
/bin
/usr/sbin
/sbin

Edit the system default manpath to resolve documentation in the same order as the binaries:

sudo vi /etc/manpaths

/usr/local/share/man
/usr/share/man
/opt/local/libexec/gnubin/man
/opt/local/share/man

The gnubin paths are for installing GNU utilities that override the BSD versions in macOS to conform to a de facto standard configuration in a world dominated by Linux + GNU servers.

If you want a contemporarybash from MacPorts, you need to have it in /etc/shells so that it can be set as a user shell with chsh.

sudo vi /etc/shells

/bin/bash
/bin/csh
/bin/ksh
/bin/sh
/bin/tcsh
/bin/zsh
/opt/local/bin/bash

Basics

MacPorts works a lot like apt you need to update the local cache and then install or update your packages.

Update local cache and macports itself

sudo port selfupdate

Install a pacakge

sudo port install

Find package

port search

List packages

List installed packages

port installed

OR

port list installed

List outdated packages

port outdated

OR

port list outdated

Update outdated packages

sudo port upgrade outdated

Remove old packages

When port upgrades a package it doesn’t delete the old one, it moves it to an inactive state so that you can roll back if the new one does not work.

You can clean up old packages

sudo port uninstall inactive

Install GNU flavor like Linux

At this point, if you primarily work with Linux servers, it makes sense to install a GNU base system to override the BSD flavor of a default macOS install.

sudo port install bash bash-completion coreutils findutils grep gnutar gawk wget

I also like to install a fully patched git to make sure that I have the current features and the bash completion scripts.

sudo port install git git-lfs

Also the latest vim.

sudo port install vim +huge

Set up bash

Make sure you have a ~/.bashrc and ~/.bash_profile.

Edit ~/.bash_profile to add

#flags to hint build systems to find things in macports
CFLAGS="$CFLAGS -I/opt/local/include" 
CXXFLAGS="$CXXFLAGS -I/opt/local/include" 
LDFLAGS="$LDFLAGS -L/opt/local/lib"
PKG_CONFIG_PATH=/opt/local/lib/pkgconfig

If MacPorts altered your PATH then comment that out:

# MacPorts Installer addition on 2016-09-22_at_13:35:36: adding an appropriate PATH variable for use with MacPorts.
# export PATH="/opt/local/bin:/opt/local/sbin:$PATH"

At the very end of ~/.bash_profile load ~/.bashrc.

if [ -f ~/.bashrc ]; then
   source ~/.bashrc
fi

In ~/.bashrc you can set up some preferences:

Prompt

I’m not into the fancy prompts. I like a classic $.

#classic, minimalist prompt + current git branch
PS1='\$ '

Prevent ssh from messing up the title

# force reset of the current directory name in terminal title
# to reset it after SSH sessions end.
PROMPT_COMMAND='echo -ne "\033]0;$(basename ${PWD})\007"'

Bash completion

if [ -f /opt/local/etc/profile.d/bash_completion.sh ]; then
  . /opt/local/etc/profile.d/bash_completion.sh
fi

Git prompt

Again, I like something simple. You can look up the fancy things.

if [ -f /opt/local/share/git/git-prompt.sh ]; then
  . /opt/local/share/git/git-prompt.sh
  PS1='\[\033[1;36m\]$(__git_ps1 "[%s] ")\[\033[0m\]\$ '
fi

Colors like Debian and Ubuntu

#colorful
export CLICOLOR=1

# The color designators are as follows:
#  
# a     black
# b     red
# c     green
# d     brown
# e     blue
# f     magenta
# g     cyan
# h     light grey
# A     bold black, usually shows up as dark grey
# B     bold red
# C     bold green
# D     bold brown, usually shows up as yellow
# E     bold blue
# F     bold magenta
# G     bold cyan
# H     bold light grey; looks like bright white
# x     default foreground or background
#  
# Note that the above are standard ANSI colors.  The actual display may differ depending on the color capabilities of the terminal in use.
#  
# The order of the attributes are as follows:
#  
# 1.   directory
# 2.   symbolic link
# 3.   socket
# 4.   pipe
# 5.   executable
# 6.   block special
# 7.   character special
# 8.   executable with setuid bit set
# 9.   executable with setgid bit set
# 10.  directory writable to others, with sticky bit
# 11.  directory writable to others, without sticky bit

if [[ $(which ls) = *gnubin* ]]; then
  # GNU ls colors
  eval "$(dircolors -b)"
  alias ls='ls --color=auto'
else
  #BSD ls colors
  #default colors
  #export LSCOLORS=exfxcxdxbxegedabagacad
  export LSCOLORS=xxfxcxdxbxegedabagacad
fi
if [[ $(which grep) = *gnubin* ]]; then
  alias grep='grep --color=auto'
  alias egrep='egrep --color=auto'
  alias fgrep='fgrep --color=auto'
else
  export GREP_OPTIONS='--color=auto'
fi
export GREP_COLOR='0;36' # regular;foreground-cyan
export MINICOM='--color on'

Prefered editor and pager

export EDITOR=vim
export PAGER=less

At this point if you open a new terminal, it should feel very much like a Linux install.

Install some other stuff

aws cli

sudo port install python38 py38-awscli
sudo port select --set python3 python38

Create a file ~/.aws/config that contains API key credentials like this:

[default]
aws_access_key_id = some-key-id
aws_secret_access_key = some-key-value
region = us-east-1

[profile some-name]
aws_access_key_id = some-key-id
aws_secret_access_key = some-key-value
region = us-east-1

Network tools

nmap
sudo port install nmap

wireshark
sudo port install GeoLiteCity wireshark3 +geoip +python38 +qt5

whatmask
sudo port install whatmask

sf-pwgen (password generator)
sudo port install sf-pwgen

axel (download accelerator)
sudo port install axel

curl
sudo port install +http2 +openldap +ssl

tcping (ping tcp ports)
sudo port install tcping

httping (ping http)
sudo port install http

minicom (terminal emulator for connecting to serial devices)
sudo port install minicom

openvpn2
sudo port install openvpn2

Programming languages

Go
sudo port install go

Rust
sudo port install rust

Java OpenJDK with IBM Eclipse OpenJ9 VM
sudo port install openjdk14-openj9

OR

Java OpenJDK with Oracle HotSpot VM
sudo port install openjdk14

Microsoft SQL Server client tools: sqlcmd and bcp
sudo port install mssql-tools

msodbcsql17 has the following notes:
  To make this work with SSL you need to create a symbolic link as follows: 
   sudo mkdir -p /usr/local/opt/openssl/ 
   sudo ln -s /opt/local/lib /usr/local/opt/openssl/lib 

   This is because this port installs binaries meant to be used with Homebrew.

sudo mkdir -p /usr/local/opt/openssl/
sudo ln -s /opt/local/lib /usr/local/opt/openssl/lib

Additional

7zip
sudo port install p7zip

youtube-dl (download video offline from youtube and other sites)
sudo port install youtube-dl

dos2unix (convert line endings)
sudo port install dos2unix

ghostscript
sudo port install ghostscript

rsync
sudo port install rsync
On UNIX Shells

A (not so) brief history of UNIX shells

In UNIX, the shell is the text-mode program that interfaces between the user and the kernel via a teletype interface — which is usually purely a software construct these day. It interprets commands, starts programs as necessary, and pipes data between programs.

Like a lot of things in UNIX the original shell, /bin/sh, was created by Ken Thompson. In 1976, with UNIX System 7, the Thompson Shell was replaced with a new /bin/sh created by another colleague at Bell Labs, Stephen Bourne. The Bourne Shell had all the key features we expect today like unlimited string size, command substitution, redirection, loops, case statements and by 1979 was pretty much done.

In 1978, Bill Joy created the C shell /bin/csh with the intention of being more friendly as an interactive environment. It turned out to be a bad scripting environment but was popular at Berkely and became the default interactive shell in Berkely UNIX and BSD.

David Korn created a new shell /bin/ksh in the 1980s based on Stephen Bourne’s source code. Korn Shell was used a lot on Solaris and with Oracle things and OpenBSD.

Kenneth Almquist reimplemented a clone of the Bourne Shell for BSD as a part of the catastrophic 1990s copyright dispute with AT&T. Debian has forked ash to the Debian Almquist Shell dash.

The Bourne Again Shell bash is the GNU project reimplementation of Bourne Shell. GNU did not stop at cloning the Bourne Shell features, they put in a whole ton of interactive and programming features.

Z (zed) Shell is a reimplementation of bash with a more liberal license. zsh aims to have full compatibility with all of the bash features and even more features of its own.

There are more shells, but I’m going to stop now.

Common system shells

Ever since AT&T Research UNIX System 7, the world has agreed that the default system interpreter is “Bourne Shell”. This is codified in the POSIX.2 standard and Single UNIX Specification. Since not everyone who wanted to create a UNIX-type operating system had legal access to the Bourne Shell source code from AT&T, fancy later shells ksh, bash, and zsh have a trick where they pretend to be the lowly old Bourne Shell if they are named sh. ash and dash pretty much are just the same as good old sh and don’t have to do a lot of pretending.

You might be surprised how deeply the system shell /bin/sh is embedded. It is used by init to run startup scripts. It’s used by web servers to connect a user request to a CGI program. It’s used by mail servers to connect bits together internally. There are tons of system and server things that are connected together with /bin/sh.

This seemed pretty smart until the shellshock family of vulnerabilities in bash were discovered in 2014 which allowed tricking servers into running arbitrary code through public services on the Internet. Now it seems like a good idea that the system shell should be as minimal and hardened as possible.

Here’s how things break down in the real world:

Red Hat uses bash as /bin/sh.

Debian and Ubuntu use dash as /bin/sh and /bin/bash as the default interactive interpreter.

NetBSD uses ash as /bin/sh and FreeBSD has their own /bin/sh.

OpenBSD uses ksh as /bin/sh.

Apple is a bit rudderless. If I recall, originally Apple was tied to its BSD roots from NeXT and used pdksh for /bin/sh and a version of the C Shell as the default for interactive users in OS X. They changed that bash for both in 10.3 Panther to be more similar to Red Hat, but kept the rest of the core system utilities BSD not GNU.

Today Apple macOS uses a really, really old forked version of bash 3.2 with security patches applied as /bin/sh. Apple stopped including bash updates in macOS (neé OS X) because the GNU project changed the license of bash to GPLv3. In macOS 10.15 Catalina bash is still the system shell /bin/sh but they changed the default shell for new users to /bin/zsh and have added /bin/dash.

In retrospect, Apple’s half-hearted attempt to include bash as a linuxism was a mistake. I hope that the arrival of dash is a sign that Apple is going to delete their decrepit old version of bash and make dash the system shell soon.

Cut to the chase or “what I use”

For interactive shell use, I use bash.

I have tried all the shells. I really tried to like zsh but I have found by the time you install all the plugins and whatnot, it is painfully slow. Today I use bash everywhere as my interactive shell. Mostly this is because it’s installed and the default on every version of Linux. This means that I install my own modern copy of bash on a Mac.

For shell scripts, I generally use the #!/bin/sh shebang but am careful to use the Bourne Shell features and not BASH features. If you are writing a script that uses #!/bin/sh as the shebang, it needs to work with dash because that’s what is on Debian and Ubuntu.

If you really want to use something other than the 1978 Bourne Shell language for a shell script, don’t hard code a path to /bin/sh. Use the /bin/env trick to allow the system to find the first match in the path. Instead of #!/bin/bash use #!/bin/env bash.

Encrypting DNS on macOS with unbound and Cloudflare

The DNS protocol traditionally runs over UDP on port 53. This is very fast but totally insecure. DNS queries can be snooped or potentially altered by anyone on the network. In my office, I use a pfSense firewall with the unbound DNS resolver configured to resolve DNS over TLS. That way my ISP neither my ISP nor the local government in Zimbabwe can observe or fiddle with DNS results.

In the olden days when I used to go places, I might use a VPN to secure all of my traffic. This is not always the optimal solutions. Sometimes, I know that all of my sensitive traffic is already encrypted and secure — except for the DNS. And I have had problems where DNS is intercepted by the ISP or hotel for advertising or other purposes. I found this particularly useful when we were staying with family last summer who have Cox Internet that does some goofy thing with DNS interception.

Unfortunately, macOS does not have DNS over TLS or DNS over HTTPS as a built in feature, yet. But I can set up unbound as a DNS resolver which does support DNS over TLS.
sudo port install unbound

unbound has the following notes:
  An example configuration is provided at
  /opt/local/etc/unbound/unbound.conf-dist.

  A startup item has been generated that will aid in starting unbound with
  launchd. It is disabled by default. Execute the following command to start it,
  and to cause it to launch at startup:

      sudo port load unbound

cd /opt/local/etc/unbound
sudo cp unbound.conf-dist unbound.conf
sudo vi unbound.conf

Find the “# forward-zones” section and insert the following:

forward-zone:
        name: "."
  forward-tls-upstream: yes
  # Cloudflare DNS
  forward-addr: 2606:4700:4700::1112@853#cloudflare-dns.com
  forward-addr: 1.1.1.2@853#cloudflare-dns.com
  forward-addr: 2606:4700:4700::1002@853#cloudflare-dns.com
  forward-addr: 1.0.0.2@853#cloudflare-dns.com

These are the Cloudflare DNS endpoints for DNS over TLS with malware protection. You can substitute alternate resolvers.

Now, if I want, I can start unbound and change my network config to use localhost as the DNS provider.

sudo port load unbound
Password:
--->  Loading startupitem 'unbound' for unbound

$ sudo lsof -i :53
COMMAND   PID    USER   FD   TYPE             DEVICE SIZE/OFF NODE NAME
unbound 85991 unbound    4u  IPv6 0xe14e1013ac1fa599      0t0  UDP localhost:domain
unbound 85991 unbound    5u  IPv6 0xe14e1013da135451      0t0  TCP localhost:domain (LISTEN)
unbound 85991 unbound    6u  IPv4 0xe14e1013bac68b69      0t0  UDP localhost:domain
unbound 85991 unbound    7u  IPv4 0xe14e1013bb2dd361      0t0  TCP localhost:domain (LISTEN)

Now, I can change my DNS provider to 127.0.0.1 and my DNS queries will be resolved by my local and cached by my local unbound instance and securely forwarded to Cloudflare over TLS.

This setup can mess with captive portals. You may need to remove the 127.0.0.1 temporarily in order to authenticate to a guest WiFi system through their web page and then turn it back on.

Configurig the postfix MTA to securely forward to a smarthost on macOS

macOS ships with postfix but it is in a semi-disabled state. The launch daemon configuration provided doesn’t work and postfix will immediately exit

What I want is a working local MTA that forwards mail securely to a smarthost for delivery. This is mostly useful when building and testing scripts and server applications that need to send mail. It is convenient to have the default MTA localhost:25 be in a working state.

Here’s the goal:

  • accept smtp connections on localhost:25 from localhost without credentials
  • relay mail (for my domain) to a smart host that has a static IP and a reputation that will make delivery possible
  • don’t have my credentials or mail snooped or intercepted
  • hopefully not be blocked by ISPs and middleboxes

I am using Amazon SES for my smarthost, but it could be gmail, outlook.com, or a corporate server. The details will be a little different depending on the smarthost.

I’m using Amazon SES in the us-east region: mail-smtp.us-east-1.amazonaws.com.

My configuration is for macOS Catalina with MacPorts as my package manager and Amazon SES as my smarthost relay. The details are slightly different but the concepts are the same for other package managers and or Linux.

Secure tunneling to a smarthost

Many ISPs and corporate networks will filter, intercept, or otherwise interfere with SMTP connections. They can also interfere with SMTP with StartTLS. With StartTLS, the connection is initially plaintext and gets upgraded to TLS if the server reports it as the capability. This connection type is vulnerable to a downgrade attack called StripTLS which prevents the encryption from being negotiated.

I have found that SMTPS or SMTP over SSL where the client first establishes an TLS connection and then performs SMTP commands and mail transfer through the resulting TLS tunnel is the most reliable, secure connection type.

Unfortunately many MTAs — including Postfix bundled with macOS and Ubuntu — do not support SMTPS natively. My solution to this problem is to use stunnel to negotiate the SMTPS and map the remote smarthost to a local port, then configure Postfix to forward its mail there.

sudo port install stunnel

sudo vi /opt/local/etc/stunnel/stunnel.conf

#foreground = yes

#[ses-tls-wrapper]
#accept = 2525
client = yes
connect = email-smtp.us-east-1.amazonaws.com:465

When running stunnel from a command-line to test things out you would want to uncomment the lines that are commented. But put the comments back in for running as a launch agent.

Then I create a launch agent configuration to start the stunnel connection whenever port localhost:2525 is requested, emulating classic inetd. The idea is that launchd listens on localhost:2525 and when it receives a connection will start stunnel and connect it to the port, but otherwise stunnel is not running. Launchd is the init process, so it is always running. On Linux, you would use a systemd unit or OpenRC script to do the same thing.

sudo vi /Library/LaunchAgents/org.macports.stunnel.plist

<plist version="1.0">
<dict>
     <key>Label</key>
     <string>org.macports.stunnel</string>
     <key>Program</key>
          <string>/opt/local/bin/stunnel</string>
    <key>Sockets</key>
    <dict>
        <key>Listeners</key>
        <dict>
            <key>SockNodeName</key>
            <string>localhost</string>
            <key>SockServiceName</key>
            <string>2525</string>
        </dict>
    </dict>
    <key>inetdCompatibility</key>
    <dict>
        <key>Wait</key>
        <false/>
    </dict>
</dict>
</plist>

sudo launchctl load /Library/LaunchAgents/org.macports.stunnel.plist

Now my smarthost at Amazon SES is connected securely to my localhost port 2525 on demand.

Configuring postfix

I need to authenticate to SES, so I need a passwd database.

cd /etc/postfix
sudo mkdir sasl
# for SES, the username and password are AWS API key ID and value
echo "email-smtp.us-east-1.amazonaws.com:465 my-aws-key-id:my-aws-key-value" | sudo tee passwd
# now make a postfix database file
sudo hashmap passwd
# now there should be a plaintext passwd file and a postfix passwd.db file

Now we need to set up postfix to relay any authenticate to SES on localhost:2525 by editing /etc/postfix main.cf.

At the end of the main.cf file we need something like this:

# your authorized domain, this may need to be edited somewhere farther up in main.cf
mydomain = brianreiter.org 

inet_interfaces = loopback-only

relayhost = localhost:2525
smtp_sasl_auth_enable = yes
smtp_sasl_security_options = noanonymous
smtp_sasl_password_maps = hash:/etc/postfix/sasl/passwd

If postfix were running, we would do sudo postfix reload at this point.

Finally we can set up a launch daemon for postfix to get it running as a service. I used to just edit the launch daemon configuration provided by Apple to get postfix working but as of High Sierra that required disabling SIP and as of Catalina the file became part of the read-only system partition.

We need to create and load a launch daemon file in /Library/LaunchDaemons where we have read/write permissions.

sudo vi /Library/LaunchDaemons/org.postfix.master.plist

<?xml version="1.0" encoding="UTF-8"?>
<!DOCTYPE plist PUBLIC "-//Apple Computer//DTD PLIST 1.0//EN" "http://www.apple.com/DTDs/PropertyList-1.0.dtd">
<plist version="1.0">
<dict>
        <key>Label</key>
        <string>org.postfix.master</string>
        <key>Program</key>
        <string>/usr/libexec/postfix/master</string>
        <key>ProgramArguments</key>
        <array>
                <string>master</string>
        </array>
        <key>QueueDirectories</key>
        <array>
                <string>/var/spool/postfix/maildrop</string>
        </array>
        <key>AbandonProcessGroup</key>
        <true/>
    <key>KeepAlive</key>
    <true/>
</dict>
</plist>

sudo launchctl load /Library/LaunchDaemons/org.postfix.master.plist

Viola, I can now use my local MTA to send mail and this works from almost anywhere.

Now, assuming that you are able to make an outbound connection to port 465, the authentication to the smarthost is correct, and that your domain is authorized with the smarthost, etc. things should be working.

If you want to use /usr/bin/mail you will need a valid mydomain in master.cf and possibly also aliases, see postfix documentation for details.

SSH muddles the Terminal.app title

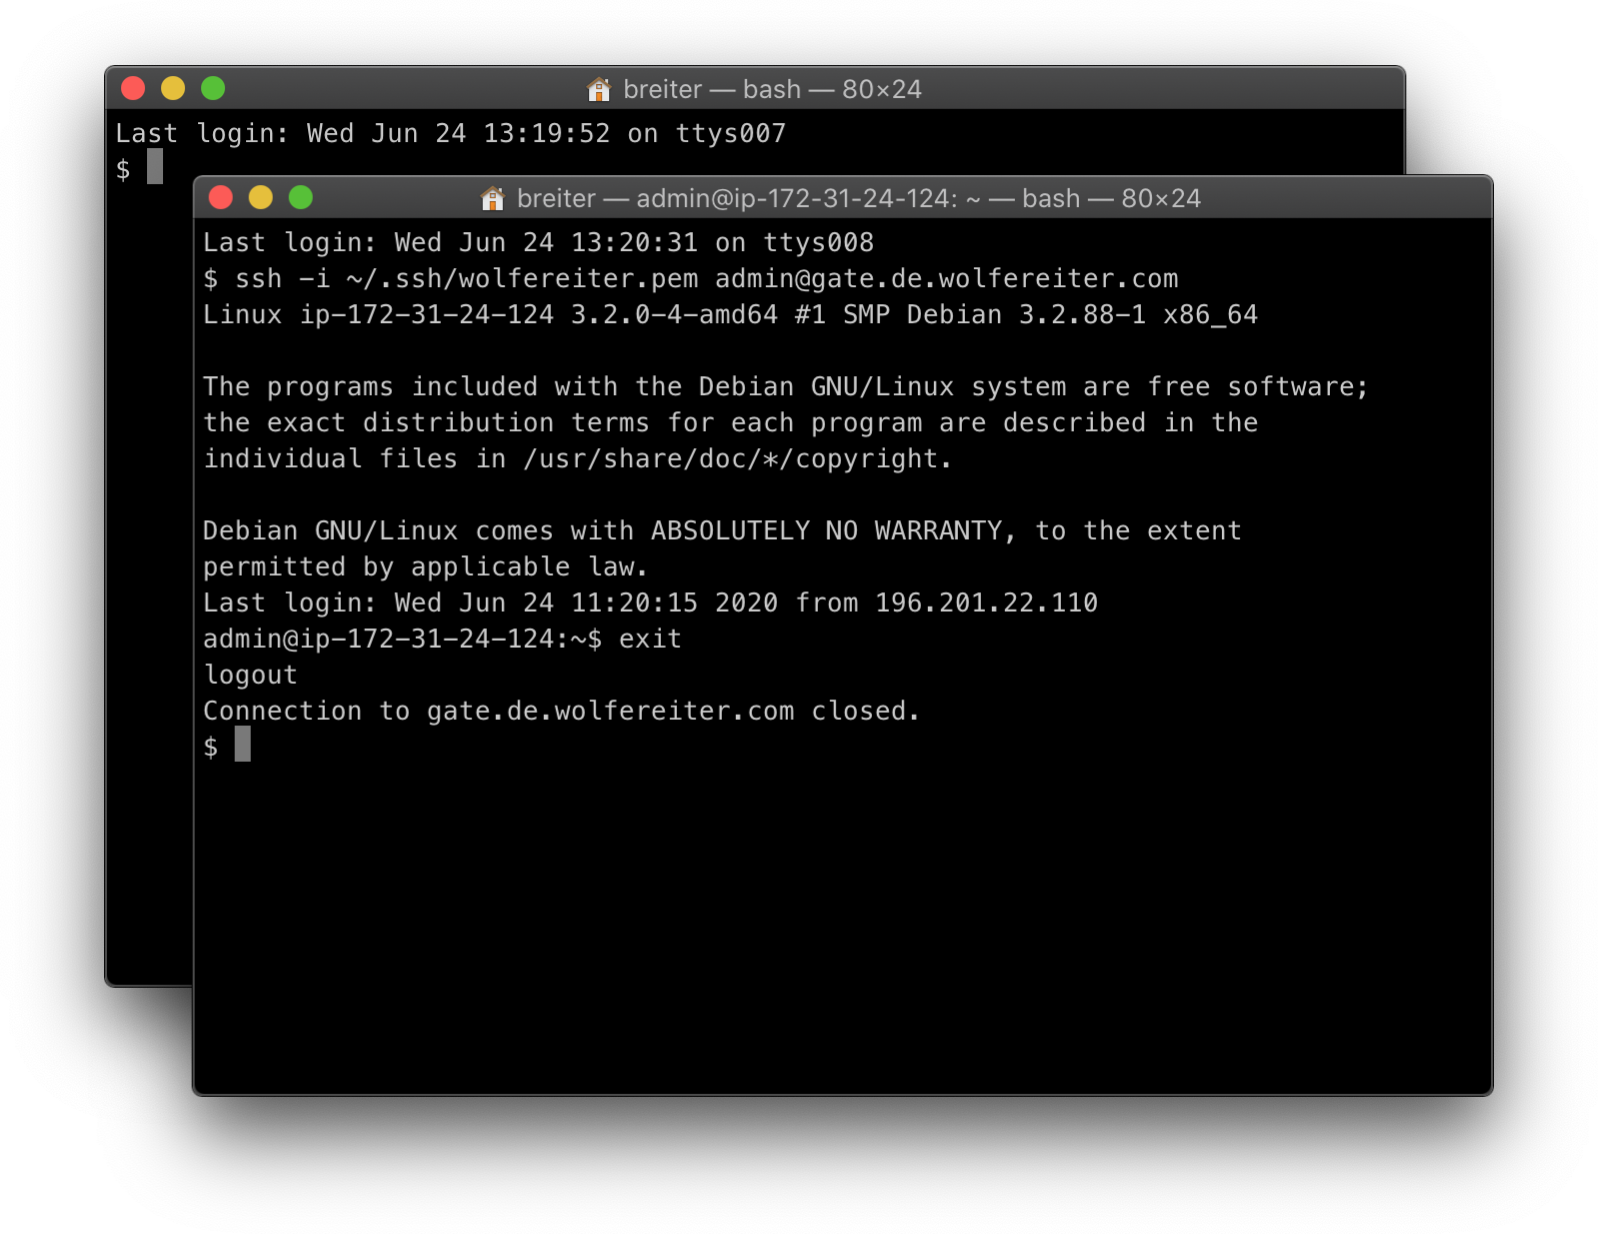
Normally, the macOS Terminal.app title bar includes the current directory name. When you connect to a remote host with openssh on macOS, the title bar gets updated to be “$(whoami)@$(hostname): $(pwd)” instead. Unfortunately when you exit ssh, the terminal title bar is not restored and continues to say you are on a remote host.

Once you see it, you can’t unsee it.

I’m sorry.

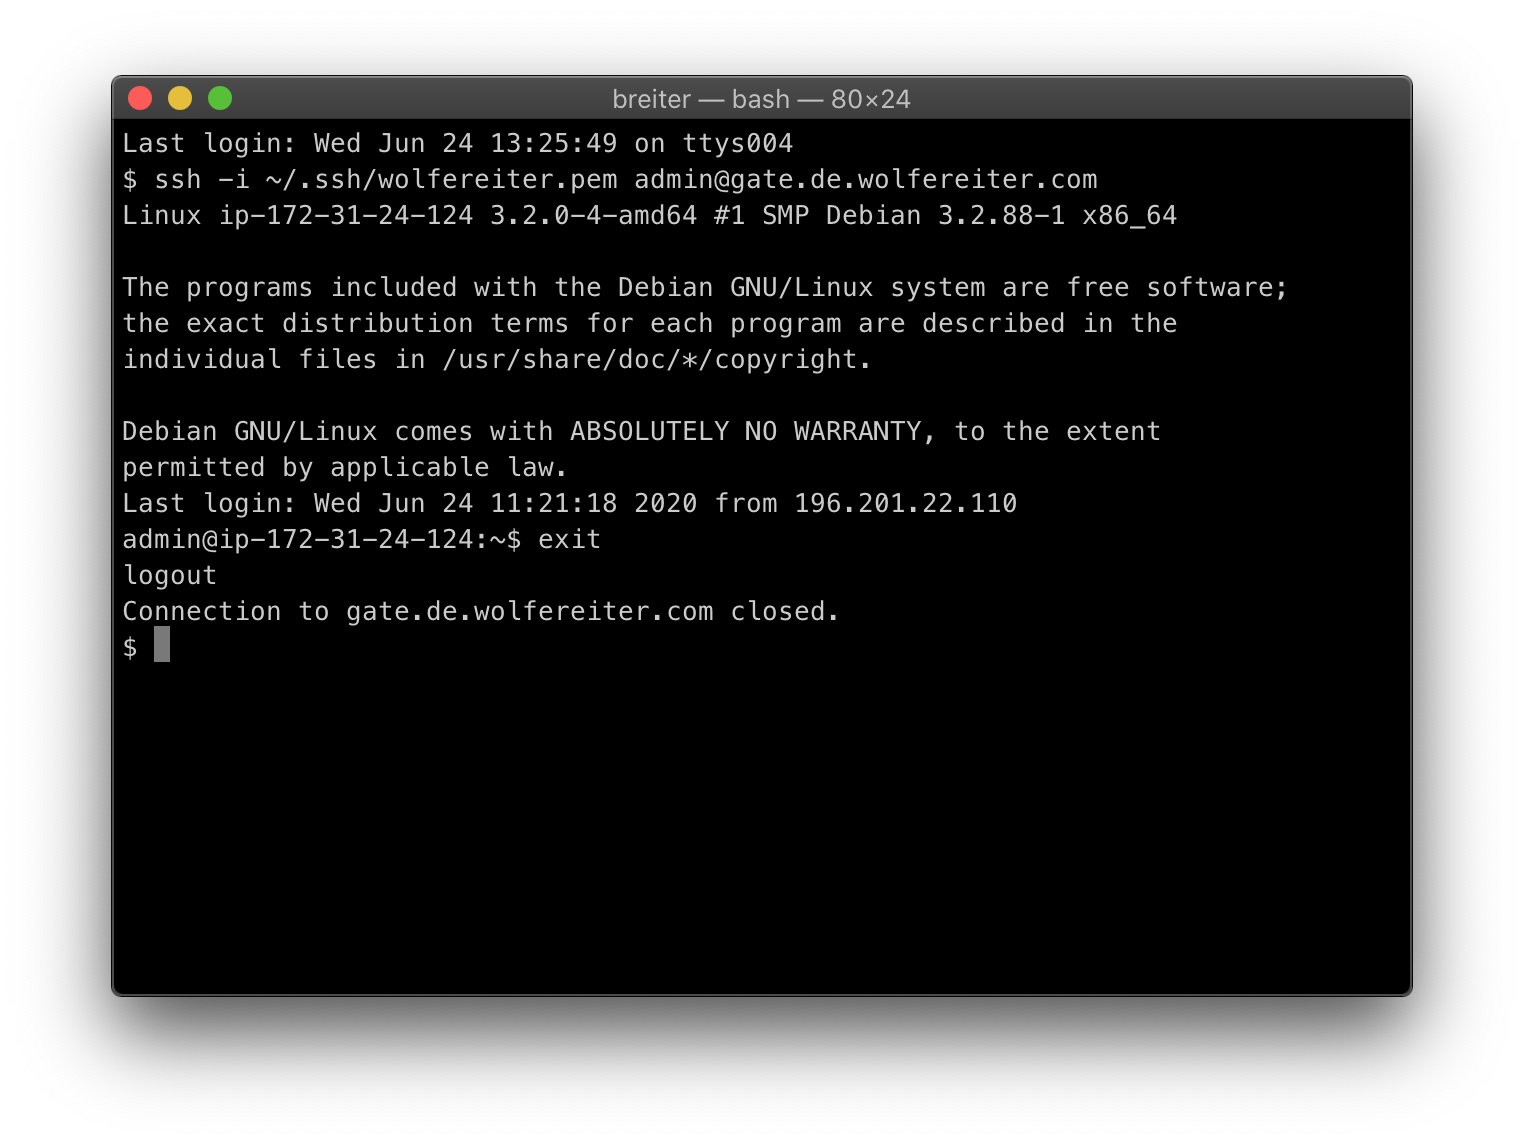
My solution is to use arcane escape sequences to reset the Terminal title every time bash generates a new prompt:

# Add to ~/.bashrc
#
# force reset of the current directory name in terminal title
# to reset it after SSH sessions end.
PROMPT_COMMAND='echo -ne "\033]0;$(basename ${PWD})\007"'

The incantation is slightly different but conceptually the same for zsh.

# Add to ~/.zshrc
function clear_term_title {
# removes the text that ssh puts into the terminal title
printf '\033]0;\007'
}
PROMPT="$(clear_term_title)%% "

Automating dotnet core SDK updates on Mac

I really enjoy working with dotnet core. It is fast, open source, and cross-platform. My preference these days for working with the .NET stack is to build dotnet core apps natively on Mac with SQL Server or PostgreSQL on Docker for Mac. We can then easily deploy Docker containers or in some cases dotnet core on an actual Debian or RHEL server with Nginx. ASP.NET 4.x still only runs on Windows Server and for that I use VMWare Fusion and deploy with Kudu.

On Linux, Microsoft provides package manager repos to maintain the dotnet core SDK, which is awesome. Microsoft also publishes a menu of Docker containers to build and run dotnet core apps. On Windows, the Visual Studio updater will install dotnet core updates for you. On Mac the same is true of Visual Studio for Mac.

But I have no particular use for Visual Studio for Mac. I use VS Code and vim. I don’t need to have Visual Studio for Mac just as a glorified package manager and I simply don’t like having things installed that I do not use. There may be a Homebrew way to manage the dotnet core SDKs but I’m not a Homebrew kind of guy and I put no effort into researching this.

Fortunately Microsoft has provided a couple of useful scripts dotnet-uninstall-pkgs.sh and dotnet-install.sh. It’s a pretty straightforward thing to script these together to maintain the LTS dotnet core SDKs.

sudo dotnet-upgrade-sdks

Problems solved. Now I need to figure out a solution to maintain mono since the Omnisharp intellisense engine in VS Code depends on mono.

Script to upgrade dotnet core LTS SDKs

#!/bin/sh
# Get the MSFT uninstall script from GitHub:
#
# curl -sSL https://raw.githubusercontent.com/dotnet/cli/master/scripts/obtain/uninstall/dotnet-uninstall-pkgs.sh | sudo tee /usr/local/bin/dotnet-uninstall-pkgs > /dev/null
# sudo chmod +x /usr/local/bin/dotnet-uninstall-pkgs
#
uninstall_cmd=dotnet-uninstall-pkgs
# MSFT install script documented on docs.microsoft.com
# https://docs.microsoft.com/en-us/dotnet/core/tools/dotnet-install-script
#
# curl -sSL https://dot.net/v1/dotnet-install.sh | sudo tee /usr/local/bin/dotnet-install > /dev/null
# chmod +x /usr/local/bin/dotnet-install
#
install_cmd=dotnet-install
# also set within dotnet-uninstall-pkgs.sh
dotnet_install_root="/usr/local/share/dotnet"
dotnet_path_file="/etc/paths.d/dotnet"
dotnet_tool_path_file="/etc/paths.d/dotnet-cli-tools"
current_userid=$(id -u)
if [ $current_userid -ne 0 ]; then
echo "$(basename "$0") requires superuser privileges to run" >&2
exit 1
fi
${uninstall_cmd}
${install_cmd} --install-dir ${dotnet_install_root} --no-path --channel 2.1 # old LTS Channel
${install_cmd} --install-dir ${dotnet_install_root} --no-path --channel LTS # current LTS Channel
echo adding dotnet and tools to path.
# created by pkg installers but not the install script
echo ${dotnet_install_root} > ${dotnet_path_file}
echo "~/.dotnet/tools" > ${dotnet_tool_path_file}
eval $(/usr/libexec/path_helper -s)

Install the script with it’s dependencies

#!/bin/sh
curl -sSL https://raw.githubusercontent.com/dotnet/cli/master/scripts/obtain/uninstall/dotnet-uninstall-pkgs.sh \
| sudo tee /usr/local/bin/dotnet-uninstall-pkgs > /dev/null
sudo chmod +x /usr/local/bin/dotnet-uninstall-pkgs
curl -sSL https://dot.net/v1/dotnet-install.sh \
| sudo tee /usr/local/bin/dotnet-install > /dev/null
chmod +x /usr/local/bin/dotnet-install
curl -sSL https://gist.github.com/breiter/aef0c0acbeb24cabe0fa16c7ecfdb88c/raw/b4e9de4b20141b0a05aadd03d5842752104b1475/dotnet-upgrade-sdks.sh \
| sudo tee /usr/local/bin/dotnet-upgrade-sdks > /dev/null
chmod +x /usr/local/bin/dotnet-upgrade-sdks

2-Step Verification Code Generator for UNIX Terminal

otp bigdigits
I have been using a time-based one time password (TOTP) generator on my phone with my clod-based accounts at Google, Amazon AWS, GitHub, Microsoft — every service that supports it — for years now. I have over a dozen of these and dragging my phone out every time I need a 2-factor token is a real pain.

I spend a lot of my time working on a trusted computer and I want to be able to generate the TOTP codes easily from that without having to use my phone. I also want to have reasonable confidence that the system is secure. I put together an old-school Bourne Shell script that does the job:

  • My OTP keys are stored in a file that is encrypted with gnupg and only decrypted momentarily to generate the codes.
  • The encrypted key file can by synchronized between computers using an untrusted service like DropBox or Google Drive as long as the private GPG key is kept secure.
  • I’m using oathtool from oath-toolkit to generate the on-time code.

Pro Tip: Most sites don’t intend you to have more than one token that generates passwords. Their enrollment process typically involves scanning a QR Code to enroll a new private key into Google Authenticator or other OATH client. I always take a screen shot of these QR Codes and keep them stored in a safe place.

Code

Save this script as an executable file in your path such as /usr/local/bin/otp.

#!/bin/sh
scriptname=`basename $0`
if [ -z $1 ]; then
echo "Generate OATH TOTP Password"
echo ""
echo "Usage:"
echo " $scriptname google"
echo ""
echo "Configuration: $HOME/.otpkeys"
echo "Format: name:key"
echo
echo "Preferably encrypt with gpg --armor to create .opkeys.asc"
echo "and then delete .optkeys"
echo ""
echo "Optionally set OTPKEYS_PATH environment variable to GPG"
echo "with path to GPG encrypted name:key file."
exit
fi
if [ -z "$(which oathtool)" ]; then
echo "othtool not found in \$PATH"
echo "try:"
echo "MacPorts: port install oath-toolkit"
echo "Debian: apt-get install oathtool"
echo "Red Hat: yum install oathtool"
exit
fi
if [ -z "$OTPKEYS_PATH" ]; then
if [ -f "$HOME/.otpkeys.asc" ]; then
otpkeys_path="$HOME/.otpkeys.asc"
else
otpkeys_path="$HOME/.otpkeys"
fi
else
otpkeys_path=$OTPKEYS_PATH
fi
if [ -z "$otpkeys_path" ]; then
>&2 echo "You need to create $otpkeys_path"
exit 1
fi
if [ "$otpkeys_path" = "$HOME/.otpkeys" ]; then
red='\033[0;31m'
NC='\033[0m' # No Color
>&2 echo "${red}WARNING: unencrypted ~/.otpkeys"
>&2 echo "do: gpg --encrypt --recipient your-email --armor ~/.otpkeys"
>&2 echo "and then delete ~/.otpkeys"
>&2 echo "${NC}"
otpkey=`grep ^$1 "$otpkeys_path" | cut -d":" -f 2 | sed "s/ //g"`
else
otpkey=`gpg --batch --decrypt "$otpkeys_path" 2> /dev/null | grep "^$1:" | cut -d":" -f 2 | sed "s/ //g"`
fi
if [ -z "$otpkey" ]
then
echo "$scriptname: TOTP key name not found"
exit
fi
oathtool --totp -b "$otpkey"
view raw otp hosted with ❤ by GitHub

In order to use my script you need to already have gnupg installed and configured with a private key.

You then need to create a plain text file that contains key:value pairs. Think of these as an associative array or dictionary where the lookup key is a memorable name and the value is a base32 encoded OATH key.

Example

fake:ORUGS4ZNNFZS2YJNMZQWWZJNNNSXS===
also-fake:ORUGS4ZNNFZS2YLMONXS2ZTBNNSQ====

Encrypt this file of name and key associations with gpg in ASCII-armor format with yourself as the recipient and save the output file as ~/.otpkeys.

$ gpg --encrypt --armor --recipient you@your-email-address.com otpkeys
$ mv otpkeys.asc ~/.otpkeys.asc

Now the script will start working. For example, generate a code for the “fake” key in the sample file (your result should be different as the time will be different):

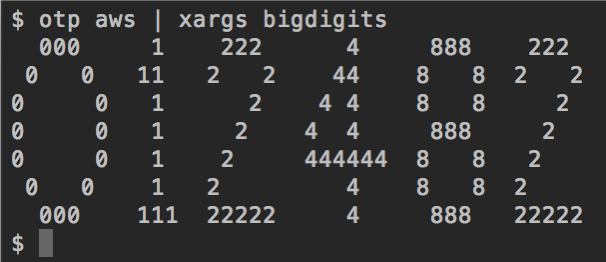
$ otp fake
487036

Extracting keys from QR Codes

At this point you may be thinking, “OK, but how the hell do I get the OTP keys to encrypt into the .otpkeys file?”

The ZBar project includes a binary zbarimg which will extract the contents of a QR Code as text in your terminal. The OATH QR Codes contain a URL and a portion of that is an obvious base32 string that is the key. On rare occasions, you may need to pad the ‘=’ at the end of the string to make it a valid base32 string that works with oathtool becuase oathtool is picky.

My favorite package manager for OS X, MacPorts, doesn’t have ZBar so I had to build it from source. Homebrew has a formula for zbar. If you are using Linux, it is probably already packaged for you. Zbar depends on ImageMagick to build. If you have ImageMagick and its library dependencies, Zbar should build for you. Clone the Zbar repo with git, check out the tag for the most recent release — currently “0.10” — and build it.

$ git clone git@github.com:Zbar/Zbar
$ cd Zbar
$ git checkout 0.10
$ make
$ sudo make install

Once you have ZBar installed, you should have zbarimg in your path and you can use it to extract the otpauth URL from your QR Code screenshot.

$ zbarimg ~/Documents/personal/totp-fake-aws.png 
QR-Code:otpauth://totp/breiter@fake-aws?secret=ORUGS4ZNNFZS2YJNMZQWWZJNNNSXS===
scanned 1 barcode symbols from 1 images in 0 seconds

I hope you already have screen shots of all your QR Codes or else you will need to generate new OTP keys for all your services and take a screen shot of the QR Code this time.

Syncing OTP key file with other computers

The otp script looks for an environmental variable OTPKEYS_PATH. You can use this to move your otp key file database to another location than ~/.otpkeys.asc. For example put it in Google Drive point the otp script to it by setting OTPKEYS_PATH in ~/.bashrc.

#path to GPG-encrypted otp key database
export OTPKEYS_PATH=~/Google\ Drive/otpkeys.asc

Now you can generate your OTP codes from the terminal in your trusted computers whenever you need them and enjoy a respite from constantly dragging your phone out of your pocket.

DIY Google Hangouts Client Independent of Chrome Browser

Hangouts Logo

Safari, Chrome and Battery Life

Remember when Chrome was new and fast and light and minimalist? The name Chrome was meant an in-joke to the UX jargon chrome, meaning the frame around an app. Chrome was just a frame to view the web. Those days are long gone. Now that Chrome has a plurality market share, Google is positioning it as an enhanced web experience, just like Microsoft did with IE. Chrome is a great browser but it also wants to be an operating system that has its own launcher and app ecosystem. It literally is an operating system when packaged as Chrome OS. Chrome is a large application these days.

With the power management improvements and battery shaming Apple built into OS X 10.9 and 10.10, is has become clear to me that Chrome requires a lot of power and memory to run. Running Chrome with only core Google plugins and extensions for Hangouts and Drive, I get about 2 hours less battery life on my 2014 15″ MacBook Pro 11,2. To put that in perspective, it is the same ballpark that I lose if I fire up VMWare to run my Windows Server 2012 R2 with Visual Studio. Running Chrome is literally a similar workload to running a hypervisor running a whole other operating system.

Enough with the Extensions

Transitioning away from Chrome is not easy, especially if you get hooked on the extension and app ecosystem. Without my even realizing it, I left the Open Web and moved into Google’s Web. I hadn’t really paid attention but it turns out that the extensions themselves each consume a lot of resources and I have run into extensions that monetize with sneaky tricks. My first step to wean myself out of this cesspool was to go on an acetic extension diet. In Chrome, I have two extensions:

In Safari and Firefox, I only have the Adblock Plus extension and nothing else.

(AdBlock Plus has become a controversial topic because of their extortion of big sites as a monetization strategy. I’ve turned off “acceptable ads” and I don’t want to see any ads. If it wasn’t AdBlock Plus, I would use something else and have done so in the past. This may make me a bad person. I don’t care. The ad networks are now a malware vector and the quantity of the ads is overwhelming. The internet needs a new monetization strategy.)

Hangouts and XMPP/Jabber

The extension diet caused me a problem because it killed Hangouts. We use Hangouts at my company so that’s a problem. I tried using the XMPP/Jabber protocol gateway to Hangouts but it is unsatisfactory:

  • The Jabber client stream doesn’t include any messages sent or received when Jabber is not connected
  • Jabber gets disconnected all the time
  • Voice and Video don’t work, although they used to when Hangouts was Google Talk
  • Google Voice voicemail messages are not delivered to Jabber
  • Google Voice SMS integration doesn’t work

So basically the XMPP gateway for Hangouts sucks.

Roll Your Own Hangouts.app With Fluid.app

It turns out that there is a Hangouts page on Google+. This page works in Chrome but also in Safari and Firefox. Pretty much everything in the Hangouts works. The only problem is that I can’t remember to open a browser window and point it there.

If you kind of squint at the Hangouts Google+ page, it kind of looks like a cross between the Hangouts Chrome extension and the Hangouts Chrome app for Windows but with a bunch of other crap in there too. I got the idea that I could get something similar to the Hangouts App for Chrome for Windows and Chrome OS on OS X if I used Fluid.app to roll my own native app wrapper for Hangouts. Fluid.app is a tool for generating WebKit site wrapper apps and it works pretty well to solve my Hangouts problem.

  • Chat history works
  • SMS and Voicemail works
  • Voice and Video works
  • It does everything that I want it to do
  • I can even pop out chats in and out of a tab or new window

Screen Shot 2015 02 11 at 12 19 25 PM
Screen Shot 2015 02 11 at 12 24 11 PM

Recipe

Fluid.app is a pretty geeky tool but the recipe to create a Hangouts app is pretty simple. At the most basic level, you can just create a new Fluid app by pointing to https://plus.google.com/hangouts and be done. It will not work correctly until you set user agent string for your new Hangouts.app to be Safari 7 but once you do that, it will work fine. You can use the Hangouts logo at the top of this article for the Dock icon.

By default Fluid apps use Safari’s cookies and will load Safari plugins. That means my Hangouts.app Just WorksTM. I am logged in by my Google Apps token in Safari. The Google Voice and Video plugin that I installed for Chrome also works in Safari and in the Hangouts.app to enable voice and video.

If you want to keep Hangouts open, even if you close the window, then in the Hangouts.app Preferences go to Behavior and select “Closing the last browser window: only hides the window”.

If you want it to be more minimalist standalone app look, then it is mostly a matter of hiding elements with some custom CSS injection in the Window > Userstyles menu.

Pattern: *plus.google.com*hangouts*

    div.Ege.qMc {
        visibility:hidden;
    }

    div#gbq {
        visibility:hidden;
    }

    div.gb_8.gb_Sc.gb_i.gb_Rc.gb_Qc {
        visibility:hidden;
    }

    div.ona.Fdb.csa {
        visibility:hidden;
    }

    div.Dge.fOa.vld {
        visibility:hidden;
    }

    div.Ima.dacD0d {
        visibility:hidden;
    }

    div.Bdc.FQb {
        visibility:hidden;
    }

And to add a little slickness add a little Userscript to fix the logo link so it links to /hangouts to pop out the buddy list by default as shown in my screenshots.

Pattern: *plus.google.com*hangouts*

    var i=0, 
        a = document.getElementsByClassName('gb_Wa gb_Ra'); //home logo link

    for(i=0; i<a.length; i++) {
        a[i].href='/hangouts';
    }

    window.onload = function() {
        setTimeout(function() {
        var j, h = document.getElementsByClassName('qoeSyc uoNTwd'); //hangouts buddy list icon element
        for(j=0; j<h.length; j++) {
            h[j].click(); //open the buddy list
        }
       }, 3000);
    };

Overall, I’m pretty pleased with how this turned out. I’m able to easily control my logged-in status on Hangouts by launching or exiting the app from my Dock. All the key feautures of Hangouts that I use work.

Update

These instructions are now obsolete. Google has created a standalone website for Hangouts at https://hangouts.google.com/. This site works great as a Fluid app without having to do any of the javascript and css hacks described above.

Screen Shot 2015 08 20 at 10 36 32 AM